Importing a ZIP file of pictures into Business Central can be useful when you need to bulk upload images for items. Follow the steps below to update your item list.
Place all the picture files into a folder and make sure that each picture has a name relating to the item. For example, item 1896-S is the ATHENS desk and the corresponding picture is 1896-S.jpg.
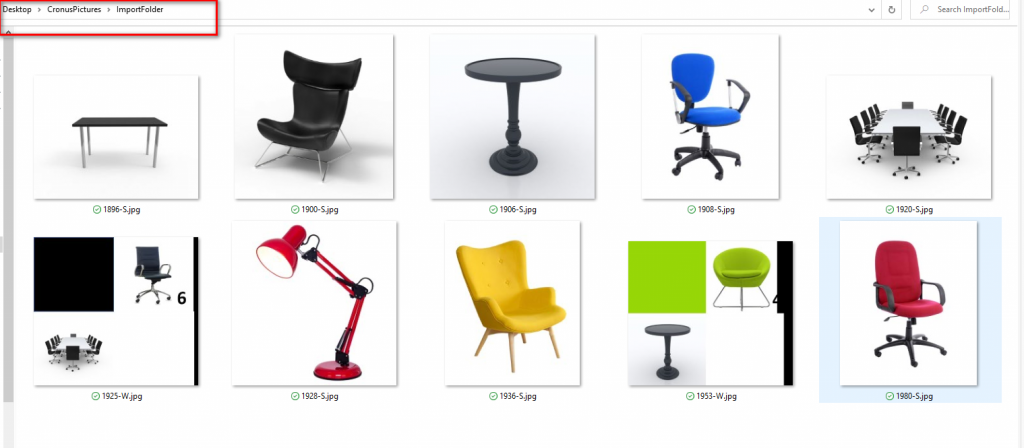
N.B. All common file names are supported and here I am using .jpg however .bmp is another option.
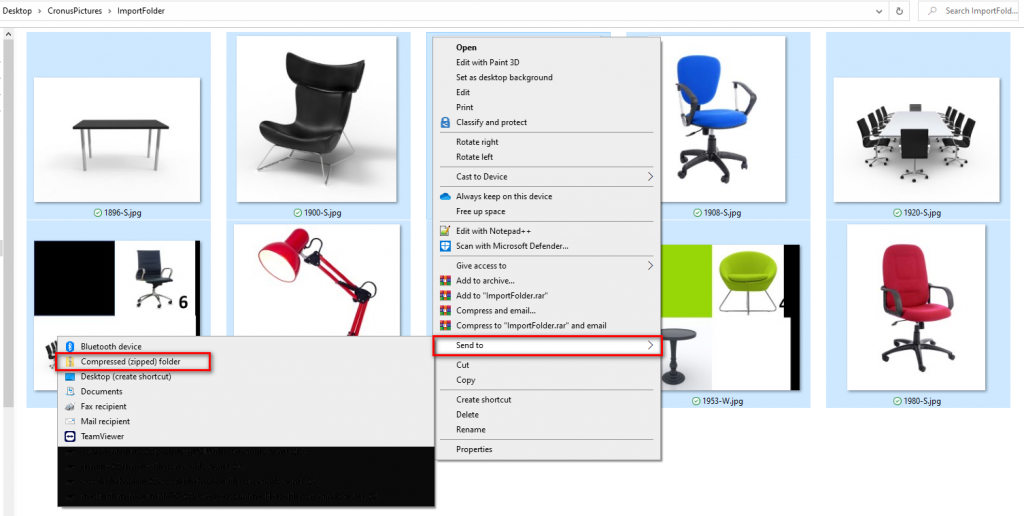
Select all the images and send to a compressed (zipped) folder
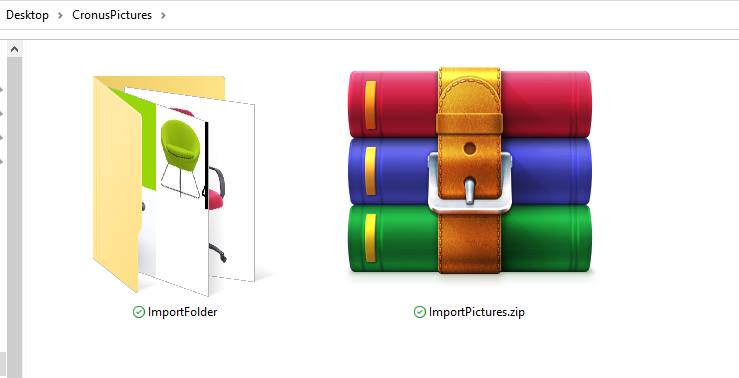
Once created you are ready to import into Business Central.
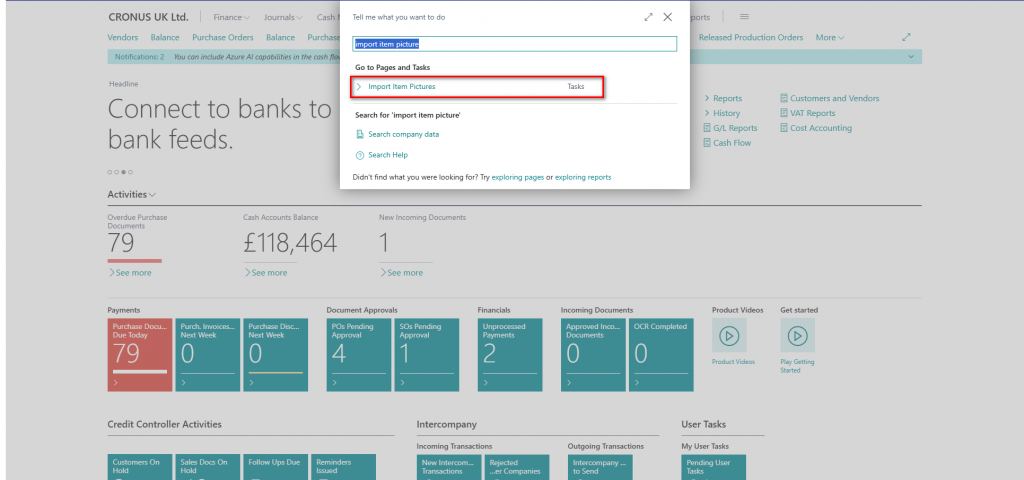
Search for Import Item Pictures and select.
Drill into the Select a ZIP file field and either browse to the saved directory to select the file or use the drag and drop feature.
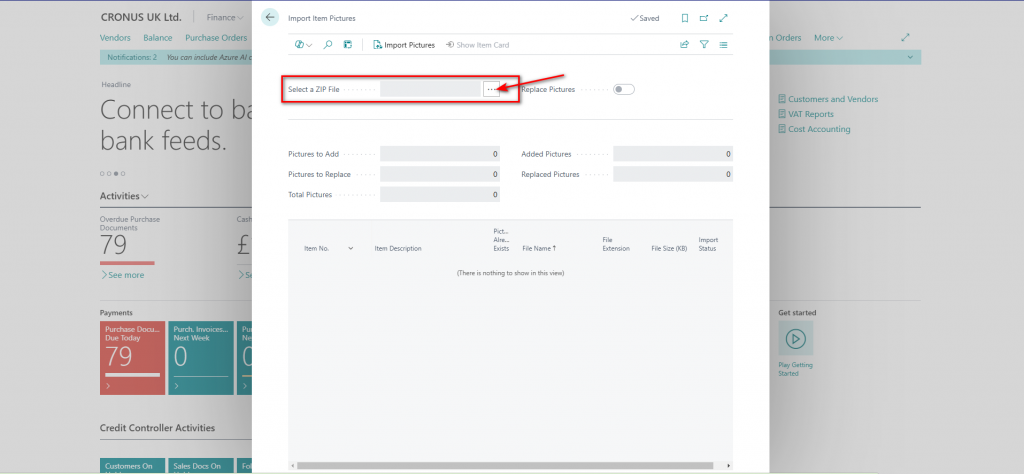
Once the file is imported a few of the fields will be updated. Pictures to add should display the total of individual pictures that were imported. If a picture already exists then you can select the slider to replace.

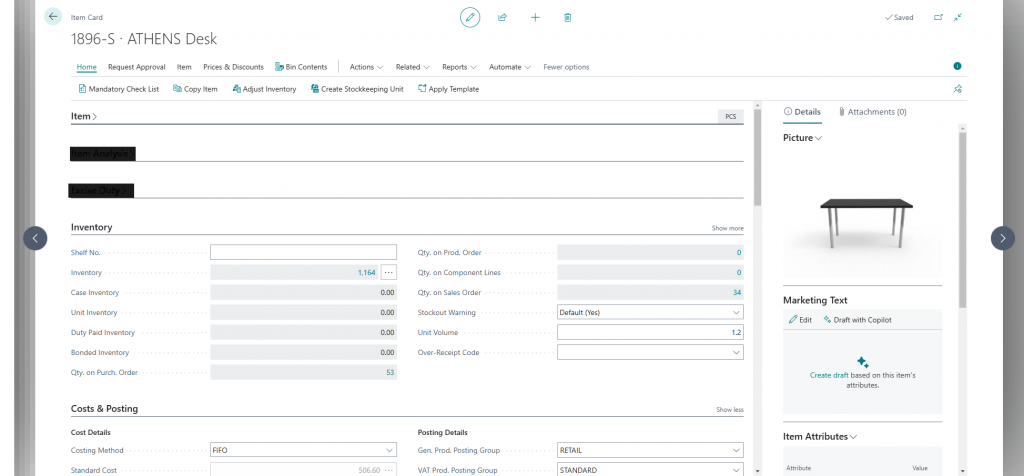
If there are no issues then select Import Pictures. The Import Status will change to Completed and you can select the Show Item Card on the ribbon to view the picture.
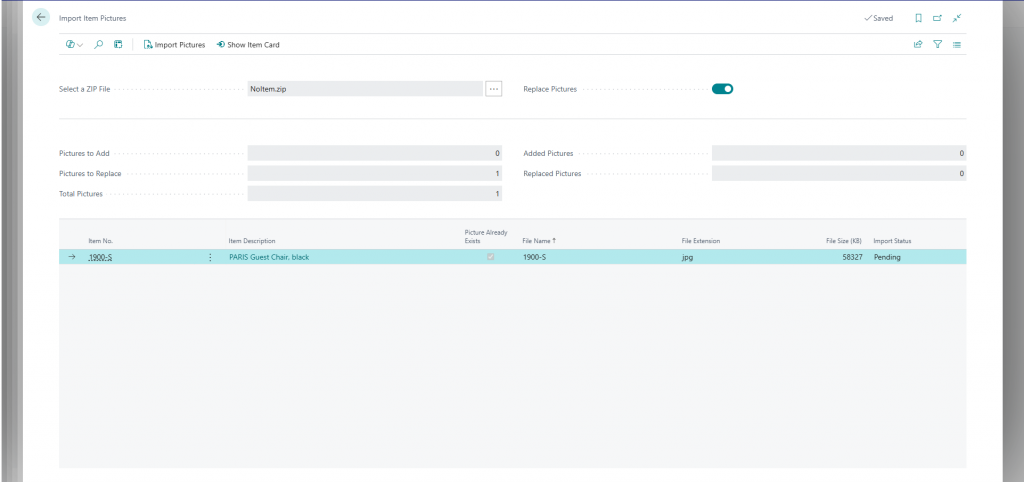
On the off chance that you have mistyped a filename and the import cannot find a matching item then it will not appear on the import screen. In this zip folder there are two files but one has been named incorrectly.
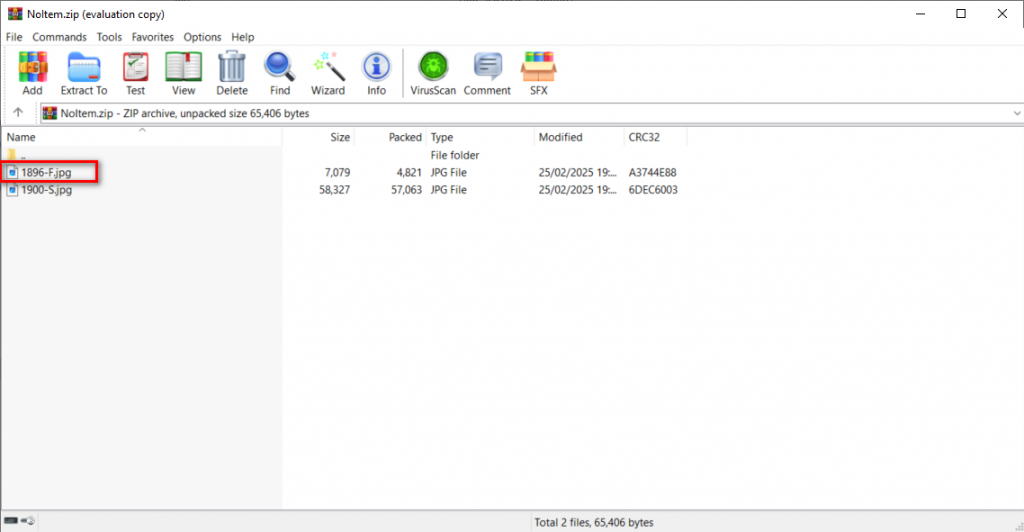
Once imported then only the valid file will display ready for import to the item card.
This option was a great find! Sometimes the most useful features in Business Central are the ones we stumble upon while searching for something else. Bulk importing images via a ZIP file can save a ton of time compared to manually uploading them one by one.
Thanks, Shauna.
Leave a Reply